Growing Beautiful Roses in Containers: A Step-by-Step Guide
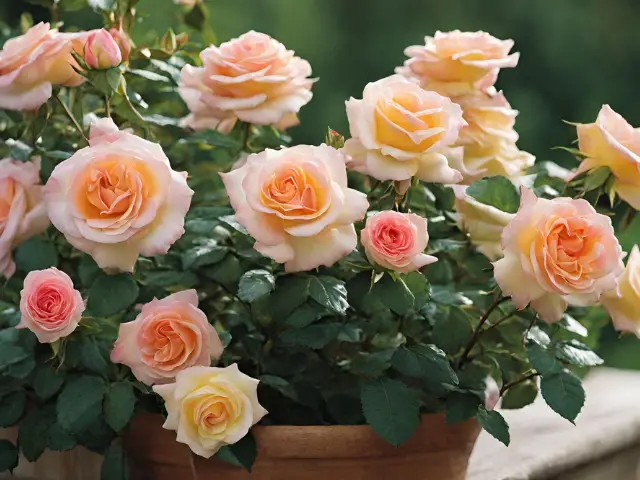
Roses are arguably the most beloved flowers in the world, known for their stunning beauty and enchanting fragrance. While growing roses in a traditional garden bed is a popular choice, many people with limited space or poor soil conditions opt to grow them in containers instead. With the right care and attention, you can successfully cultivate breathtaking roses in containers that will add charm and elegance to any space. In this step-by-step guide, we will walk you through the process of growing beautiful roses in containers.
1. Choosing the Right Container:
Selecting the appropriate container is crucial for successful rose cultivation. Look for a pot that is at least 18 inches wide and deep, allowing ample space for root growth. It should also have drainage holes to prevent waterlogged soil, which can lead to root rot.
2. Picking the Right Rose Variety:
When it comes to choosing roses for your container garden, consider compact or miniatures varieties that are well-suited for containers. Look for rose varieties labeled as “patio” or “shrub” roses as they tend to have smaller root systems and will adapt better to container life.
3. Preparing the Container:
Before planting your roses, make sure your container is clean and has been filled with high-quality potting mix. This mix should be well-draining but still retain moisture adequately.
4. Planting the Roses:
Gently remove your rose plant from its nursery pot and loosen its roots if they appear compacted or tangled. Dig a hole in the center of your container large enough to accommodate the entire root ball of the rose plant without bending or crowding its roots.
5. Proper Watering:
Water your newly planted rose thoroughly until water runs out of the drainage holes, ensuring that moisture reaches deep into the roots. Container-grown roses require regular watering but avoid overwatering as it may cause waterlogged soil. Allow the top inch of soil to dry out slightly before watering again.
6. Providing Adequate Sunlight:
Place your container in an area that receives at least six hours of direct sunlight every day. Roses thrive in full sun, and insufficient sunlight can result in weak plants and poor blooming.
7. Fertilizing Regularly:
Container-grown roses benefit from regular feeding to ensure healthy growth and abundant flowering. Use a slow-release rose fertilizer or a liquid fertilizer specifically formulated for roses, following the package instructions for application rates.
8. Pruning and Deadheading:
Regular pruning is necessary to encourage new growth and maintain the desired shape of your rose plant. Remove any dead or diseased branches, as well as spent flowers, by cutting just above an outward-facing bud.
9. Pest Control:
Keep a watchful eye for common rose pests such as aphids, spider mites, or blackspot fungus. If detected early, these issues can be effectively controlled with organic insecticidal sprays or soapy water solutions.
10. Winter Protection:
In colder regions, protect your container-grown roses from harsh winter conditions by moving them to a sheltered location or insulating the pot itself with bubble wrap or burlap.
By following these ten steps, you can successfully grow beautiful roses in containers and enjoy their timeless beauty right on your balcony, patio, or even indoors. With proper care and attention throughout the growing season, your container roses will reward you with gorgeous blooms that will fill your surroundings with their heavenly fragrance and vibrant colors. So go ahead and embark on this delightful journey of growing roses in containers – it’s an experience that every gardening enthusiast should indulge in!


